GamerX.mp
Objects › Textures › Texture files › lod7_sfe.txd

lod7_sfe.txd

59 textures from GTA San Andreas, at their original size. Click a picture for the full-size PNG.

The copy buttons fill these in. Source object 9959 uses this texture file. In game: /ssoma for a streamed object, /svoma for a vehicle object.

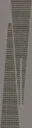
bigcentral_lod1 texture from lod7_sfe.txd (GTA San Andreas)

bigcentral_lod1

32 × 64 px
Download PNG
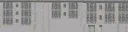
bigcentral_lod2 texture from lod7_sfe.txd (GTA San Andreas)

bigcentral_lod2

64 × 64 px
Download PNG
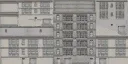
bigcentral_lod3 texture from lod7_sfe.txd (GTA San Andreas)

bigcentral_lod3

64 × 64 px
Download PNG
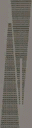
lod_pyramid1 texture from lod7_sfe.txd (GTA San Andreas)

lod_pyramid1

32 × 128 px
Download PNG
loda14_a texture from lod7_sfe.txd (GTA San Andreas)

loda14_a

64 × 64 px
Download PNG
loda14_b texture from lod7_sfe.txd (GTA San Andreas)

loda14_b

64 × 64 px
Download PNG
loda14_c texture from lod7_sfe.txd (GTA San Andreas)

loda14_c

64 × 64 px
Download PNG
loda14_d texture from lod7_sfe.txd (GTA San Andreas)

loda14_d

64 × 64 px
Download PNG
loda14_e texture from lod7_sfe.txd (GTA San Andreas)

loda14_e

64 × 64 px
Download PNG
loda15_a texture from lod7_sfe.txd (GTA San Andreas)

loda15_a

64 × 64 px
Download PNG
loda15_b texture from lod7_sfe.txd (GTA San Andreas)

loda15_b

32 × 64 px
Download PNG
loda15_c texture from lod7_sfe.txd (GTA San Andreas)

loda15_c

32 × 32 px
Download PNG
loda15_d texture from lod7_sfe.txd (GTA San Andreas)

loda15_d

64 × 32 px
Download PNG
loda16_b texture from lod7_sfe.txd (GTA San Andreas)

loda16_b

32 × 32 px
Download PNG
loda16_c texture from lod7_sfe.txd (GTA San Andreas)

loda16_c

64 × 64 px
Download PNG
loda16_d texture from lod7_sfe.txd (GTA San Andreas)

loda16_d

32 × 64 px
Download PNG
loda45_a texture from lod7_sfe.txd (GTA San Andreas)

loda45_a

64 × 64 px
Download PNG
loda45_b texture from lod7_sfe.txd (GTA San Andreas)

loda45_b

32 × 64 px
Download PNG
loda45_c texture from lod7_sfe.txd (GTA San Andreas)

loda45_c

64 × 64 px
Download PNG
loda45_d texture from lod7_sfe.txd (GTA San Andreas)

loda45_d

32 × 32 px
Download PNG
loda45_e texture from lod7_sfe.txd (GTA San Andreas)

loda45_e

64 × 64 px
Download PNG
loda46_a texture from lod7_sfe.txd (GTA San Andreas)

loda46_a

32 × 64 px
Download PNG
loda46_b texture from lod7_sfe.txd (GTA San Andreas)

loda46_b

32 × 64 px
Download PNG
loda46_c texture from lod7_sfe.txd (GTA San Andreas)

loda46_c

32 × 64 px
Download PNG
loda46_d texture from lod7_sfe.txd (GTA San Andreas)

loda46_d

64 × 64 px
Download PNG
loda46_e texture from lod7_sfe.txd (GTA San Andreas)

loda46_e

32 × 64 px
Download PNG
loda46_f texture from lod7_sfe.txd (GTA San Andreas)

loda46_f

64 × 64 px
Download PNG
loda46_g texture from lod7_sfe.txd (GTA San Andreas)

loda46_g

64 × 64 px
Download PNG
loda47_a texture from lod7_sfe.txd (GTA San Andreas)

loda47_a

64 × 32 px
Download PNG
loda47_b texture from lod7_sfe.txd (GTA San Andreas)

loda47_b

64 × 32 px
Download PNG
loda47_c texture from lod7_sfe.txd (GTA San Andreas)

loda47_c

64 × 32 px
Download PNG
loda47_d texture from lod7_sfe.txd (GTA San Andreas)

loda47_d

64 × 64 px
Download PNG
loda53_a texture from lod7_sfe.txd (GTA San Andreas)

loda53_a

128 × 32 px
Download PNG
loda53_b texture from lod7_sfe.txd (GTA San Andreas)

loda53_b

32 × 32 px
Download PNG
loda54_a texture from lod7_sfe.txd (GTA San Andreas)

loda54_a

64 × 64 px
Download PNG
loda54_b texture from lod7_sfe.txd (GTA San Andreas)

loda54_b

64 × 64 px
Download PNG
loda54_c texture from lod7_sfe.txd (GTA San Andreas)

loda54_c

64 × 64 px
Download PNG
loda55_a texture from lod7_sfe.txd (GTA San Andreas)

loda55_a

64 × 64 px
Download PNG
loda55_b texture from lod7_sfe.txd (GTA San Andreas)

loda55_b

64 × 64 px
Download PNG
loda55_c texture from lod7_sfe.txd (GTA San Andreas)

loda55_c

64 × 64 px
Download PNG
loda56_a texture from lod7_sfe.txd (GTA San Andreas)

loda56_a

128 × 64 px
Download PNG
loda56_b texture from lod7_sfe.txd (GTA San Andreas)

loda56_b

64 × 64 px
Download PNG
loda56_c texture from lod7_sfe.txd (GTA San Andreas)

loda56_c

32 × 32 px
Download PNG
loda57_a texture from lod7_sfe.txd (GTA San Andreas)

loda57_a

64 × 64 px
Download PNG
loda57_b texture from lod7_sfe.txd (GTA San Andreas)

loda57_b

32 × 32 px
Download PNG
loda58_a texture from lod7_sfe.txd (GTA San Andreas)

loda58_a

64 × 64 px
Download PNG
loda58_b texture from lod7_sfe.txd (GTA San Andreas)

loda58_b

32 × 32 px
Download PNG
loda70_a texture from lod7_sfe.txd (GTA San Andreas)

loda70_a

64 × 64 px
Download PNG
loda70_b texture from lod7_sfe.txd (GTA San Andreas)

loda70_b

32 × 64 px
Download PNG
loda70_c texture from lod7_sfe.txd (GTA San Andreas)

loda70_c

64 × 32 px
Download PNG
loda71_a texture from lod7_sfe.txd (GTA San Andreas)

loda71_a

64 × 64 px
Download PNG
loda71_b texture from lod7_sfe.txd (GTA San Andreas)

loda71_b

64 × 32 px
Download PNG
loda71_c texture from lod7_sfe.txd (GTA San Andreas)

loda71_c

64 × 32 px
Download PNG
lodstuff_sfe33_a texture from lod7_sfe.txd (GTA San Andreas)

lodstuff_sfe33_a

32 × 64 px
Download PNG
lodstuff_sfe33_b texture from lod7_sfe.txd (GTA San Andreas)

lodstuff_sfe33_b

32 × 32 px
Download PNG
sfroad2_lod texture from lod7_sfe.txd (GTA San Andreas)

sfroad2_lod

64 × 64 px
Download PNG
vicstuff_sfe45_lod texture from lod7_sfe.txd (GTA San Andreas)

vicstuff_sfe45_lod

64 × 64 px
Download PNG
yetanotherlodsfe1 texture from lod7_sfe.txd (GTA San Andreas)

yetanotherlodsfe1

32 × 64 px
Download PNG
yetanotherlodsfe2 texture from lod7_sfe.txd (GTA San Andreas)

yetanotherlodsfe2

32 × 64 px
Download PNG