GamerX.mp
Objects › Textures › Texture files › lodvegaswest3.txd

lodvegaswest3.txd

110 textures from GTA San Andreas, at their original size. Click a picture for the full-size PNG.

The copy buttons fill these in. Source object 7676 uses this texture file. In game: /ssoma for a streamed object, /svoma for a vehicle object.

actopblank_128 texture from lodvegaswest3.txd (GTA San Andreas)

actopblank_128

32 × 32 px
Download PNG
ahoodfence2_lod texture from lodvegaswest3.txd (GTA San Andreas)

ahoodfence2_lod

32 × 32 px
Download PNG
airportmetalwalllod texture from lodvegaswest3.txd (GTA San Andreas)

airportmetalwalllod

32 × 32 px
Download PNG
badhousegttrng03_lod texture from lodvegaswest3.txd (GTA San Andreas)

badhousegttrng03_lod

32 × 32 px
Download PNG
badhousewallb01_lod texture from lodvegaswest3.txd (GTA San Andreas)

badhousewallb01_lod

32 × 32 px
Download PNG
badhousewallb02_lod texture from lodvegaswest3.txd (GTA San Andreas)

badhousewallb02_lod

32 × 32 px
Download PNG
badhousewallc01_lod texture from lodvegaswest3.txd (GTA San Andreas)

badhousewallc01_lod

32 × 32 px
Download PNG
badhousewalld01_lod texture from lodvegaswest3.txd (GTA San Andreas)

badhousewalld01_lod

32 × 32 px
Download PNG
badhousewalld02_lod texture from lodvegaswest3.txd (GTA San Andreas)

badhousewalld02_lod

32 × 32 px
Download PNG
badhousewalld04_lod texture from lodvegaswest3.txd (GTA San Andreas)

badhousewalld04_lod

32 × 32 px
Download PNG
badhousewalld05_lod texture from lodvegaswest3.txd (GTA San Andreas)

badhousewalld05_lod

32 × 32 px
Download PNG
bailbondvg_lod texture from lodvegaswest3.txd (GTA San Andreas)

bailbondvg_lod

32 × 32 px
Download PNG
banditsign_lod texture from lodvegaswest3.txd (GTA San Andreas)

banditsign_lod

64 × 64 px, transparent
Download PNG
block2lod texture from lodvegaswest3.txd (GTA San Andreas)

block2lod

32 × 32 px
Download PNG
blueroof_lod texture from lodvegaswest3.txd (GTA San Andreas)

blueroof_lod

32 × 32 px
Download PNG
conc_slabgrey_lodlod texture from lodvegaswest3.txd (GTA San Andreas)

conc_slabgrey_lodlod

32 × 32 px
Download PNG

concretebuild_lod texture from lodvegaswest3.txd (GTA San Andreas)

concretebuild_lod

32 × 32 px
Download PNG
concretedust2_lod texture from lodvegaswest3.txd (GTA San Andreas)

concretedust2_lod

32 × 32 px
Download PNG
corporate3green_lod texture from lodvegaswest3.txd (GTA San Andreas)

corporate3green_lod

64 × 64 px
Download PNG
curbyell_lod texture from lodvegaswest3.txd (GTA San Andreas)

curbyell_lod

32 × 32 px
Download PNG
des_dirt1_lod texture from lodvegaswest3.txd (GTA San Andreas)

des_dirt1_lod

32 × 32 px
Download PNG
dryhedge_lod texture from lodvegaswest3.txd (GTA San Andreas)

dryhedge_lod

32 × 32 px
Download PNG
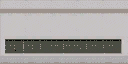
duskyred_lod texture from lodvegaswest3.txd (GTA San Andreas)

duskyred_lod

32 × 32 px
Download PNG
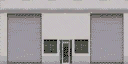
frogspawn1_lod texture from lodvegaswest3.txd (GTA San Andreas)

frogspawn1_lod

32 × 32 px
Download PNG
genroof02_lod texture from lodvegaswest3.txd (GTA San Andreas)

genroof02_lod

32 × 32 px
Download PNG
grass_lod texture from lodvegaswest3.txd (GTA San Andreas)

grass_lod

32 × 32 px
Download PNG
hangersign01_lod texture from lodvegaswest3.txd (GTA San Andreas)

hangersign01_lod

32 × 32 px
Download PNG
lightwallbalod texture from lodvegaswest3.txd (GTA San Andreas)

lightwallbalod

32 × 32 px
Download PNG
lod_abattoir_conc2 texture from lodvegaswest3.txd (GTA San Andreas)

lod_abattoir_conc2

32 × 32 px
Download PNG
lod_abpave_gen texture from lodvegaswest3.txd (GTA San Andreas)

lod_abpave_gen

32 × 32 px
Download PNG
lod_church_dirt2 texture from lodvegaswest3.txd (GTA San Andreas)

lod_church_dirt2

32 × 32 px
Download PNG
lod_grimebrick texture from lodvegaswest3.txd (GTA San Andreas)

lod_grimebrick

32 × 32 px
Download PNG
lod_hedge1_256 texture from lodvegaswest3.txd (GTA San Andreas)

lod_hedge1_256

32 × 32 px
Download PNG
lodalleywall3 texture from lodvegaswest3.txd (GTA San Andreas)

lodalleywall3

32 × 32 px
Download PNG
lodasheddoor2 texture from lodvegaswest3.txd (GTA San Andreas)

lodasheddoor2

32 × 32 px
Download PNG
lodbballgroound1 texture from lodvegaswest3.txd (GTA San Andreas)

lodbballgroound1

64 × 64 px
Download PNG
lodbuild1_256 texture from lodvegaswest3.txd (GTA San Andreas)

lodbuild1_256

32 × 32 px
Download PNG
lodbuild2_256 texture from lodvegaswest3.txd (GTA San Andreas)

lodbuild2_256

32 × 32 px
Download PNG
lodcretemanky texture from lodvegaswest3.txd (GTA San Andreas)

lodcretemanky

32 × 32 px
Download PNG
lodding3_64hv texture from lodvegaswest3.txd (GTA San Andreas)

lodding3_64hv

32 × 32 px
Download PNG
lodeywall2 texture from lodvegaswest3.txd (GTA San Andreas)

lodeywall2

32 × 32 px
Download PNG
lodfrateblue1_32 texture from lodvegaswest3.txd (GTA San Andreas)

lodfrateblue1_32

32 × 32 px
Download PNG
lodfrateblue2_32 texture from lodvegaswest3.txd (GTA San Andreas)

lodfrateblue2_32

32 × 32 px
Download PNG
lodfratered1_32 texture from lodvegaswest3.txd (GTA San Andreas)

lodfratered1_32

32 × 32 px
Download PNG
lodfratered2_32 texture from lodvegaswest3.txd (GTA San Andreas)

lodfratered2_32

32 × 32 px
Download PNG
lodfrateyellow1_32 texture from lodvegaswest3.txd (GTA San Andreas)

lodfrateyellow1_32

32 × 32 px
Download PNG
lodfrateyellow2_32 texture from lodvegaswest3.txd (GTA San Andreas)

lodfrateyellow2_32

32 × 32 px
Download PNG
lodhousewal1 texture from lodvegaswest3.txd (GTA San Andreas)

lodhousewal1

32 × 32 px
Download PNG
lodhse6_128 texture from lodvegaswest3.txd (GTA San Andreas)

lodhse6_128

32 × 32 px
Download PNG
lodjmscruffwall3 texture from lodvegaswest3.txd (GTA San Andreas)

lodjmscruffwall3

32 × 32 px
Download PNG
lodneatwoodfence texture from lodvegaswest3.txd (GTA San Andreas)

lodneatwoodfence

32 × 32 px
Download PNG
lodroof05l256 texture from lodvegaswest3.txd (GTA San Andreas)

lodroof05l256

32 × 32 px
Download PNG
lodrottenwall texture from lodvegaswest3.txd (GTA San Andreas)

lodrottenwall

32 × 32 px
Download PNG
lodtb64 texture from lodvegaswest3.txd (GTA San Andreas)

lodtb64

32 × 32 px
Download PNG
lodwrehse13_lodlod texture from lodvegaswest3.txd (GTA San Andreas)

lodwrehse13_lodlod

64 × 64 px
Download PNG
lodwrehse14_lod texture from lodvegaswest3.txd (GTA San Andreas)

lodwrehse14_lod

128 × 64 px
Download PNG
lodwrehse15_lod texture from lodvegaswest3.txd (GTA San Andreas)

lodwrehse15_lod

64 × 64 px
Download PNG
lodwrehse2_256 texture from lodvegaswest3.txd (GTA San Andreas)

lodwrehse2_256

32 × 32 px
Download PNG
lodwrehse4_256 texture from lodvegaswest3.txd (GTA San Andreas)

lodwrehse4_256

32 × 32 px
Download PNG
mallsign1_lod texture from lodvegaswest3.txd (GTA San Andreas)

mallsign1_lod

32 × 32 px
Download PNG
marinawindow1_lod texture from lodvegaswest3.txd (GTA San Andreas)

marinawindow1_lod

32 × 32 px
Download PNG
pawnsigns01_lod texture from lodvegaswest3.txd (GTA San Andreas)

pawnsigns01_lod

32 × 32 px
Download PNG
pinkwall01_lod texture from lodvegaswest3.txd (GTA San Andreas)

pinkwall01_lod

32 × 32 px
Download PNG
puttywall1_lod texture from lodvegaswest3.txd (GTA San Andreas)

puttywall1_lod

32 × 32 px
Download PNG
redshade2_lod texture from lodvegaswest3.txd (GTA San Andreas)

redshade2_lod

32 × 32 px
Download PNG
redstones01_lod texture from lodvegaswest3.txd (GTA San Andreas)

redstones01_lod

64 × 64 px
Download PNG
roof01l256_lod texture from lodvegaswest3.txd (GTA San Andreas)

roof01l256_lod

32 × 32 px
Download PNG
roof01llod texture from lodvegaswest3.txd (GTA San Andreas)

roof01llod

32 × 32 px
Download PNG
roof04llod texture from lodvegaswest3.txd (GTA San Andreas)

roof04llod

32 × 32 px
Download PNG
roof06llod texture from lodvegaswest3.txd (GTA San Andreas)

roof06llod

32 × 32 px
Download PNG
souveniers1_lod texture from lodvegaswest3.txd (GTA San Andreas)

souveniers1_lod

32 × 32 px
Download PNG
steakhouse_lod texture from lodvegaswest3.txd (GTA San Andreas)

steakhouse_lod

64 × 32 px
Download PNG
steakhselodtex1 texture from lodvegaswest3.txd (GTA San Andreas)

steakhselodtex1

64 × 64 px
Download PNG
steakhselodtex2 texture from lodvegaswest3.txd (GTA San Andreas)

steakhselodtex2

64 × 64 px
Download PNG
sw_wallbrick_lod texture from lodvegaswest3.txd (GTA San Andreas)

sw_wallbrick_lod

32 × 32 px
Download PNG
vegaswigshop1_lod texture from lodvegaswest3.txd (GTA San Andreas)

vegaswigshop1_lod

32 × 32 px
Download PNG
venbuildwh_law2lod texture from lodvegaswest3.txd (GTA San Andreas)

venbuildwh_law2lod

32 × 32 px
Download PNG
vgnalleywall1_lod texture from lodvegaswest3.txd (GTA San Andreas)

vgnalleywall1_lod

32 × 32 px
Download PNG
vgndwntwnrf1_lod texture from lodvegaswest3.txd (GTA San Andreas)

vgndwntwnrf1_lod

32 × 32 px
Download PNG
vgndwntwnrf2_lod texture from lodvegaswest3.txd (GTA San Andreas)

vgndwntwnrf2_lod

32 × 32 px
Download PNG
vgngewall2_128 texture from lodvegaswest3.txd (GTA San Andreas)

vgngewall2_128

32 × 32 px
Download PNG
vgngrglod1 texture from lodvegaswest3.txd (GTA San Andreas)

vgngrglod1

64 × 64 px
Download PNG
vgngrglod2 texture from lodvegaswest3.txd (GTA San Andreas)

vgngrglod2

64 × 64 px
Download PNG
vgngrglod3 texture from lodvegaswest3.txd (GTA San Andreas)

vgngrglod3

64 × 64 px
Download PNG
vgnhsewall1_lod texture from lodvegaswest3.txd (GTA San Andreas)

vgnhsewall1_lod

32 × 32 px
Download PNG
vgnlodcorp1 texture from lodvegaswest3.txd (GTA San Andreas)

vgnlodcorp1

32 × 32 px
Download PNG
vgnstadwal1_lod texture from lodvegaswest3.txd (GTA San Andreas)

vgnstadwal1_lod

64 × 64 px
Download PNG
vgnstadwal2_lod texture from lodvegaswest3.txd (GTA San Andreas)

vgnstadwal2_lod

32 × 64 px
Download PNG
vgnstadwal3_lod texture from lodvegaswest3.txd (GTA San Andreas)

vgnstadwal3_lod

32 × 64 px
Download PNG
vgnstadwal4_lod texture from lodvegaswest3.txd (GTA San Andreas)

vgnstadwal4_lod

128 × 64 px
Download PNG
vgnstonewall1_lod texture from lodvegaswest3.txd (GTA San Andreas)

vgnstonewall1_lod

32 × 32 px
Download PNG
vgnwrehse3_lod texture from lodvegaswest3.txd (GTA San Andreas)

vgnwrehse3_lod

32 × 32 px
Download PNG
vgnwrehselod1 texture from lodvegaswest3.txd (GTA San Andreas)

vgnwrehselod1

64 × 64 px
Download PNG
vgnwrehselod2 texture from lodvegaswest3.txd (GTA San Andreas)

vgnwrehselod2

64 × 64 px
Download PNG
vgnwrehselod3 texture from lodvegaswest3.txd (GTA San Andreas)

vgnwrehselod3

64 × 64 px
Download PNG
vgnwrehselod4 texture from lodvegaswest3.txd (GTA San Andreas)

vgnwrehselod4

128 × 64 px
Download PNG
vgnwrehselod5 texture from lodvegaswest3.txd (GTA San Andreas)

vgnwrehselod5

128 × 64 px
Download PNG
vgnwrehselod6 texture from lodvegaswest3.txd (GTA San Andreas)

vgnwrehselod6

128 × 64 px
Download PNG
vgnwrehselod7 texture from lodvegaswest3.txd (GTA San Andreas)

vgnwrehselod7

128 × 64 px
Download PNG
vgstrainstation3_lod texture from lodvegaswest3.txd (GTA San Andreas)

vgstrainstation3_lod

64 × 64 px
Download PNG
villagreenlodlod texture from lodvegaswest3.txd (GTA San Andreas)

villagreenlodlod

32 × 32 px
Download PNG
villainnwall02_lod texture from lodvegaswest3.txd (GTA San Andreas)

villainnwall02_lod

32 × 32 px
Download PNG
weldwed1_lod texture from lodvegaswest3.txd (GTA San Andreas)

weldwed1_lod

32 × 32 px
Download PNG
ws_alley2_lod_plain texture from lodvegaswest3.txd (GTA San Andreas)

ws_alley2_lod_plain

32 × 32 px
Download PNG
ws_carpark2lod texture from lodvegaswest3.txd (GTA San Andreas)

ws_carpark2lod

32 × 32 px
Download PNG
ws_carparknew2lod texture from lodvegaswest3.txd (GTA San Andreas)

ws_carparknew2lod

32 × 32 px
Download PNG
ws_chipboard_lod texture from lodvegaswest3.txd (GTA San Andreas)

ws_chipboard_lod

32 × 32 px
Download PNG
ws_rooftarmaclod texture from lodvegaswest3.txd (GTA San Andreas)

ws_rooftarmaclod

32 × 32 px
Download PNG
yardgrass1_lod texture from lodvegaswest3.txd (GTA San Andreas)

yardgrass1_lod

32 × 32 px
Download PNG
zippizzaco_lod texture from lodvegaswest3.txd (GTA San Andreas)

zippizzaco_lod

32 × 32 px
Download PNG